Sunday, October 23, 2011

Peanut Butter & Jelly Cupcakes


One of my all time favorites since I was a kid was PB&J sandwiches! I could eat them everyday. Actually, I do. So when I found a recipe for PB&J cupcakes in my nifty cupcake book, I was excited!

Peanut Butter & Jelly Cupcakes
I grabbed the ingredients I had and supplemented what I didn't and started my adventure of creating these wonderfully peanut buttery treats.
After you gather your ingredients, combine all the dry ingredients and wet ingredients into 2 separate bowls and mix.
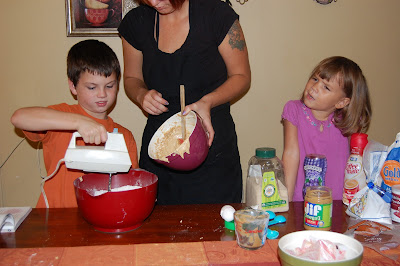
Once you've done that, slowly add the 2 bowls together. It's a little thick with the peanut butter so add slowly. My son said the blender was taking over! :)

Voila! Here's your peanut butter batter. Taste it. It's nommy! Make sure to save some for the cupcakes. :)
Place your cupcake foils in your cupcake tray and fill about two-thirds full.
My kids LOVED the peanut butter batter!
On top of your batter dabble a blob of your choice of Jelly or preserves. Then take a stirrer and swirl it into the cupcake. You don't want to over stir.
Fresh out of the oven! Kitchen smells like a true PB & J. The swirl in the cupcake stayed in tact. I thought these were by far the coolest I've seen a cupcake baked. The design is cute enough not to frost, but that is the gooiest part, so we can't skip that!
Quick pose with our stars of this show =)
The frosting! Mix your ingredients for your frosting. Have a taste to make sure it's as nommy as the batter! Add more powdered sugar if you like it thicker and more milk if you like it thinner.
I couldn't wait to get these guys frosted!! I was always told to wait until the cupcakes cooled all the way until frosting them. I just couldn't wait. I tried for about 15 minutes, but that's all I lasted until I started. The inside was a little warm, but that enhanced the gooey effect I was seeking.
Ta-Da! Peanut Butter & Jelly cupcakes!!!!
Here's the gooey-yummy-peanut buttery-goodness of a PB&J cupcake!!!


Makes about 20 cupcakes
(recipe adapted from Cupcakes Galore by Gail Wagman)

 
2 1/2 cups all-purpose flour

3 tsp baking powder

1/2 stick unsalted butter, room temperature

1 1/2 cups light brown sugar

3/4 cup peanut butter

1 tsp vanilla extract

3 eggs

1 cup half-and-half or light cream (i used french vanilla creamer)

your choice of jelly! (preserves come out with more flavor and color)


Peanut Butter Frosting 


1/4 cup butter

1/2 cup smooth peanut butter

2 cups powdered sugar

2 tbsp milk

Saturday, October 15, 2011

Pumpkin Cupcakes with Cream Cheese Frosting


Hey everyone, it's Stephanie! I guess my fellow blogmates decided to save the best for last ;) I kid, I kid. So my choice for the bake off was pumpkin cupcakes with cream cheese frosting. I've always loved pumpkin anything, and cream cheese frosting is aaamazing!! Like Kelly I am OBSESSED with Pinterest. I found a great recipe for cupcakes while playing around on there. There is so much to see on that website. As this is not a blog post for Pinterest, I will move on!


My recipe called for all cake flour, and that's what I used. I'm learning that sometimes that can lead to dry cupcakes, but mine weren't. I think that's because there was pumpkin in it; it helped to moisten them. If I were to make these again (which I'm sure I will!), I would probably add more pumpkin. These cupcakes tasted amazing, but not quite pumpkiny enough. There were many spices in the recipe, and they really added to the flavor. I sifted all the dry ingredients together. Then using the hand mixer, I mixed it into the wet ones. It smelled so good, even before baking. These cupcakes are the meaning of fall!!


Look at that pretty color of that batter! Is it just me or did anyone notice that I apparently like green shirts?! lol I'll have to remember to wear a different color to our next get together.


I can't believe there was any batter left for baking! It was so yummy!


I used a basket weave frosting tip. I thought that would add to the fall feel of the cupcake. Now I have to say, I added more cream cheese and powdered sugar to the frosting recipe that I am posting at the end. I put another 8 ounces of cream cheese and two pounds of sugar. It made a ton of frosting, but it was sooooo good!! We could not stop dipping our fingers in it. I added to the recipe because the frosting was rather thin.


I love how both the cupcakes and the decoration encompass fall. These are the perfect cupcakes for a crisp fall day.


Pumpkin Cupcakes with Cream Cheese Frosting

For the Cupcakes:
4 cups cake flour (not self-rising), sifted
1 teaspoon baking soda
1 Tablespoon + 1 teaspoon baking powder
1 teaspoon salt
2 teaspoons ground cinnamon
1 Tablespoon ground ginger
1 teaspoon freshly grated nutmeg
¼ teaspoon ground cloves
1 cup (2 sticks) unsalted butter, room temperature
2½ cups packed light-brown sugar
4 large eggs
1 cup buttermilk
1½ cups canned pumpkin (not pie filling)


For the Cream Cheese Frosting:
1 cup (2 sticks) unsalted butter, room temperature
12 ounces cream cheese, room temperature
1 pound (4 cups) confectioners’ sugar, sifted
¾ teaspoon vanilla extract


Directions:

1. Preheat oven to 350°F. Line standard muffin tins with paper liners. Sift together flour, baking soda, baking powder, salt and spices.

2. With an electric mixer on medium-high speed, cream butter and brown sugar until pale and fluffy. Add eggs, one at a time, beating until each is incorporated, scraping down sides of bowl as needed. Reduce speed to low. Add flour mixture in three batches, alternating with two additions of buttermilk, and beating until just combined. Add pumpkin; beat until just combined.

3. Divide batter evenly among lined cups, filling each three-quarters full. Bake, rotating tins halfway through, until golden brown, 15 to 18 minutes. Move cupcakes to wire racks to cool.

4. To finish, use an offset spatula or a pastry bag fitted with a decorated tip to top the cupcakes with cream cheese frosting.


Directions for frosting:

With an electric mixer on medium-high speed, beat butter and cream cheese until fluffy, 2 to 3 minutes. Reduce speed to low. Add sugar, ½ cup at a time, and then vanilla, and mix until smooth and combined, scraping down sides of bowl as needed. (Remember I added more to make it thicker)


recipe adapted from the brown eyed baker blog


Wednesday, October 12, 2011

Red Velvet Vampire Cupcakes- AKA Count Cupcakeula!


Michelle here with my yummy Red Velvet Vampire Cupcakes!  If anyone truly knows me, they will tell you that I love red velvet cake.  It could be the deep red color (my favorite!) the southern girl inside of me, or the scrumptious chocolate cake.  It is truly a mystery, but I can say honestly that it is my favorite cake of all time.  

I have always had a fascination for Vampires as well.  I love reading Anne Rice, Bram Stoker and other random vampire books.  I will admit to enjoying the Twilight series, although the movies don't really do it for me.  But I digress....onto what you are reading this blog for...the scariest cupcake of them all---Count Cupcakeula!


How could I even try to bake a cupcake that could be compared to my favorite horror characters of all time? I wanted to be sure to encompass everything I loved about vampires.  Black liners for the dark cloak, deep red cake for the blood that sustained their existence and pale white frosting for the skin that has never been touched by the sun.  Oh yeah and let's not forget the edible glitter.  Just in case they are the type of vampires that prefer to sparkle.  :)


The baking started off with your typical cake recipe.  I sifted flour, creamed butter and eggs and prepared the cupcake tins for the completed batter.  I went with a mixture of half cake flour and half all purpose flour.  We have learned in the past that although cake flour is a great addition, it sometimes can leave the cuppies a little too dense.  I wanted these little monsters to be moist and springy, and this half and half mixture accomplished that goal.

After the basics were done, I moved on to the three most necessary ingredients in any red velvet cake recipe: buttermilk, vinegar and red food coloring.

I mixed the buttermilk and red food coloring together.  To get this beautiful rich red, I had to use almost an entire container of Wilton's cake frosting coloring in Red, Red.

It turned out perfect!  The vinegar was next.  I mixed the vinegar with the baking soda.  Honestly, part of me felt like I was making a volcano with the kids in my preschool class rather than baking cupcakes!  But this mixture caused an amazing transformation in the batter.  It turned it silky and smooth.  

After prepping the batter, I had to take another picture.  They looked so pretty and red.  I wasn't sure I would be able to last the 20 minute baking time.  I was just hoping that they would stay this lovely color!

And I am pleased to announce, with photographic proof, that they did!


After cooling the cupcakes on wire racks, it was time to frost them.  


I went with a cream cheese frosting.  I used a large round tip to pipe swirls on top.  After that, a good sprinkle of clear edible glitter made them sparkle like a vampire in the meadow on a clear sunny day!


I will have to say that one of my good friends, Ginger, loves the sparkly type of Vampires, so she was pretty psyched about the sparkles.  I even gave her the first cupcake to enjoy.  It looks like she was happy about that!  


Now onto the most important part of any vampire, the blood dripping fangs!  I thought quite awhile on the perfect blood for these cupcakes.  I thought about using strawberry glaze or raspberry preserves.  I decided on Wilton's red sparkle gel icing.  I just didn't want to play around with too many flavors and the sugary taste of the gel doesn't overpower the chocolate or cream cheese flavors.


These cupcakes turned out exactly as I imagined and they tasted amazing! 


Recipe for Red Velvet Cupcakes:

Red Velvet Cake

Ingredients:

1 cup all-purpose flour
1 cup cake flour
1 tsp baking soda
1/2 tsp salt
1/3 cup cocoa
1-1/2 cup sugar
1/2 cup butter
2 eggs
red food coloring 
1 tsp vanilla
1 tsp
vinegar
1 cup buttermilk

Directions:

1.  Preheat oven to 350 degrees. In a medium bowl, sift together flour, salt and cocoa.

2.  In a large bowl, cream butter and sugar until completely mixed- about 4 minutes.  Add eggs 1 at a time, mixing after each addition.  Add vanilla and mix once again.

3.  In a small bowl, whisk the red food coloring into the buttermilk.  Add the amount of food coloring needed to get a rich red color.

4.  Alternately add the flour and red buttermilk to the butter and sugar mixture.  Mix the batter well, scraping the sides of the bowl periodically.

5.  Combine the vinegar and baking soda in a mug or small bowl.  Mix and fold into the batter with a  spatula.  The batter should turn silky.

6.  Bake in the preheated oven for 20 minutes, or until a toothpick inserted in the middle comes out clean.  Cool on wire racks.

Standard Cream Cheese Frosting

Ingredients:

2-  8 oz. packs of cream cheese
1/2 cup butter
2 cups powdered sugar
1 tsp. vanilla
Wilton's red cake gel

Directions:

1.  Mix all of the ingredients in a bowl until mixed completely.  Now you can frost with a knife, or fill up a frosting bag and pipe away!

2.  To make the vampires dripping fangs, poke a whole on either side of the frosting with the tip of the cake gel and pipe down.


I hope you have enjoyed this recipe.  See you next blog!


Apple Pie Cupcakes with Cinnamon Buttercream Frosting

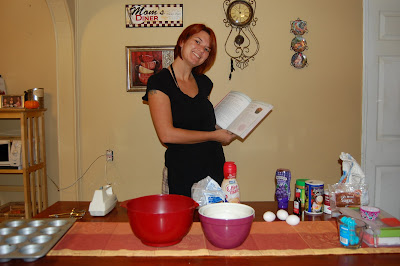
My name is Kelly and I have an addiction to Pinterest. Since joining Pinterest, I have found inspiration from so many different types of cupcakes. When I saw some apple pie cupcakes I thought it would be the perfect creation to make for our bake off. For those of you who don't know my husband Andy, apple pie is one of his favorite treats. Andy can be a bit picky about sweets, and, well, just food in general. So, if I could make an apple pie cupcake that he would enjoy, I would consider it a success.

I started working on the cupcake batter by sifting the dry ingredients. Jen bought me a sifter for my birthday and I needed to give it a little tough love to get my dry ingredients nice and fluffy.


With my hand mixer, I creamed the butter and sugar. Then, I added four eggs mixing after each one. I added a little vanilla extract. I added the dry ingredients to the mixture by alternating with milk. The batter tasted nice and sweet, but I wanted it to have a little more of an apple pie taste. I sprinkled in a little cinnamon and then peeled and boiled one Granny Smith green apple.


I pureed the apple with Logan's Baby Bullet after they were soft. You can use a regular blender for this step too. I mixed in the apple with the cake batter and acheived the subtle apple cinnamon taste I was going for. You don't want to go too heavy with flavor since you will be making an apple filling and cinnamon frosting.

While the cupcakes were baking our photographer took a break to catch up on the news.


I started working on the apple filling mixture. On the stove, I started heating up some butter, cinnamon and sugar.


I also worked on peeling and dicing three more Granny Smith apples. After the cinnamon sugar mixture was heated, I added in the apples and cooked them until they were soft.


The apples are going to be a little tart still, but that's ok. The tartness is needed to counterbalance the cake and frosting.

Once the cupcakes were cooled, I started hollowing out the centers with a baby spoon. Once again, you can use any tool in your kitchen to hollow out the insides of the cupcakes. Just use whatever is handy, but be careful not to puncture the bottom of the cupcakes. The baby spoon worked great for spooning in the apple filling. On second thought, maybe you should just get a baby spoon since it worked so well.


The cupcakes looked so delicious after the filling was put in. Almost good enough to eat without frosting. However, without frosting a cupcake is just an ugly muffin. In this case, though, it would have been a pretty muffin.

After the cupcakes were filled, I whipped up some cinnamon buttercream frosting. So good! I drew a circle around the cupcake with the frosting using a wide star tip.


The cupcakes were delicious and I highly suggest you make them.

Apple Pie Cupcakes with Cinnamon Buttercream Frosting

Cupcake Ingredients:
2 cups flour
1 cup cake flour
1 tbsp baking powder
1/2 tsp salt
1 cup unsalted butter at room temperature
2 cups sugar
4 eggs
1 1/2 tsp vanilla extract
1 cup milk
1 tbsp cinnamon
1 Granny Smith apple pureed

Directions:
1. Preheat over to 350 F.
2. In a medium bowl, sift flour, cake flour, baking powder and salt.
3. With an electric mixer, cream butter and sugar until fluffy. Beat in eggs one at a time. Add vanilla extract.
4. Add dry ingredients and milk alternating with each addition.
5. Peel and boil Granny Smith apple. After the apple is soft, puree and add to batter with cinnamon.
6. Fill cupcake liners 3/4 full and bake 18 to 22 minutes until golden. Allow cupcakes to cool.

Apple Filling Ingredients:
2 tbsp butter
2 tsp cinnamon
3 tbsp sugar
3 Granny Smith apples, peeled, cored and diced

Directions:
1. Heat butter in skillet. Add cinnamon and sugar and cook until hot and bubbly.
2. Add diced apples to mixture and heat until apples are tender. It will take about 10 minutes. Be sure to mix frequently.


When the apple mixture cools, core the cupcakes and fill the cupcakes. Let the apples come out of the top, but leave room around the sides for frosting.

Cinnamon Buttercream Frosting Ingredients:
1/2 cup butter
4 cups powdered sugar
3 tbsp milk
1 tsp vanilla extract
1 tsp cinnamon

Directions:
1. Using an electric mixer combine butter and sugar, adding sugar one cup at a time.
2. Add milk, vanilla and cinnamon and beat for 1 minute.
3. If the frosting is too runny add more powdered sugar. If it's too thick add more milk.
4. Use a wide star tip and frost around the outside edge of the cupcakes.


This recipe is adapted from Annie's Eats and Food.com. It is inspired by The Tale of Two Kitchens blog.


Tuesday, October 11, 2011

Sweet Potato Cupcakes

Sweet Potato cupcakes? Yes! Sounds a little odd, but, oddly enough, they were good!! Jen here, with my story on how the little old sweet potato became a yummy treat! Make way for a new type of cupcake. The sweet potato cupcake!


Adding ingredients in their natural form was something I wanted to bring to my cupcakes. In trying to make them a little healthier, as healthy as a cupcake can be, we have an orange.

Squish, squish. Fresh orange juice!


Another of the fresh ingredients is the star of my recipe, the sweet potato. Just microwave two sweet potatoes for approximately 6-8 minutes until you can put a fork in it. Slice them in half then scrape out the inside goodness! You will need 16 ounces of sweet potato. It ended up being the perfect amount with one large and one medium sweet potato.


I didn't know what to mash the sweet potato with. Kelly's George Foreman cleaner thingy worked out great. Take a look around your kitchen for alternatives and it lets your items have more than one use. :)

In your bowl of hopefully mushed sweet potatoes add the fresh orange juice and vanilla extract.


Sugar is always used in baking. I wanted to go natural. So I chose to use Florida Organic sugar cane.

Here is a picture of the yummy batter ready to be poured.


Take your pecans, hopefully contained, and smash away! Keep hitting them until they are the size you desire.


Toast the pecans on the stove until you can smell them. Be sure to check on them so you don't end up burning them like I almost did. Shhhh. Our little secret. ;)


Put the pecans on the bottom of the cupcake holders. If you're a big pecan lover, you can even put them in the batter.


Had some fun at Home Goods and found this nifty batter squeezer thing. It was very controlled. I highly recommend grabbing one.


I wanted to test out this other cool gadget, cupcake/pie maker, so I used the rest of the sweet potato cupcake batter and filled about 3/4 of the way. This was fantastic. It allowed me to make lots of smaller sized sweet potato cupcakes in case you wanted a smaller version.


After baking the cupcakes, take them out two minutes before they are done cooking and set your oven to broil. I found these gigantic marshmallows and cut the bad boys in half. Take one half facing down and plop it onto all of the cupcakes. Put in the oven and watch them closely! This is your topping for these cupcakes. After they are done being toasted, take them out of the oven and press them down so they cover the whole cupcake.


As for the little ones, as soon as they were done, I put them on a cooling rack. I took those gigantic marshmallows and cut the halves into another half and put them on top while they were still warm. It allows the bottom of the marshmallow to glue itself to the mini version.


Top your cupcake with or without a pecan and call it a day!


And that's the story how a sweet potato became a cupcake!~ Sweet Potato Cupcakes ~


This is Jen saying thanks for reading! Signing out!!


~*~


Ingredients


1 cup coarsely chopped pecans


2 cups of sugar (organic or not) ;)


1 cup butter, softened


4 large eggs


16 oz mashed sweet potatoes


2/3 cup orange juice (freshly squeezed)


1 tsp vanilla extract


3 cups all-purpose flour


1 tsp baking powder


1 tsp ground cinnamon


1/2 tsp baking soda


1/2 tsp ground nutmeg


1/4 tsp salt


Garnish : Pecans


Preparation


1. Toast pecans stove top or place them on a baking pan for 350* for 8 to 10 min or until toasted.

2. Beat sugar and butter at medium speed with an electric mixer until blended. Add eggs, 1 at a time, beating until blended after each addition.

3. Whisk together mashed sweet potatoes, orange juice, and vanilla extract. Combine flour and next 5 ingredients. Add flour mixture to sugar mixture alternately with sweet potato mixture, beginning and ending with flour mixture. Beat at low speed just until blended after each addition. Fold in toasted pecans or leave out and put in baking cups. Place baking cups in muffin pan, filling two-thirds full.

4. Bake at 350* for 26-28 minutes or until a wooden pick inserted into center comes out clean. Place marshmallow halves on top and put in broiler. Watch them closely.

5. Share and enjoy!